Create a Member
Create a member when you need a real client account or a pending test account for setup. Pending members are useful because you can assign memberships, book sessions, and test invoices before inviting anyone.
1. Open Users
Go to Users.
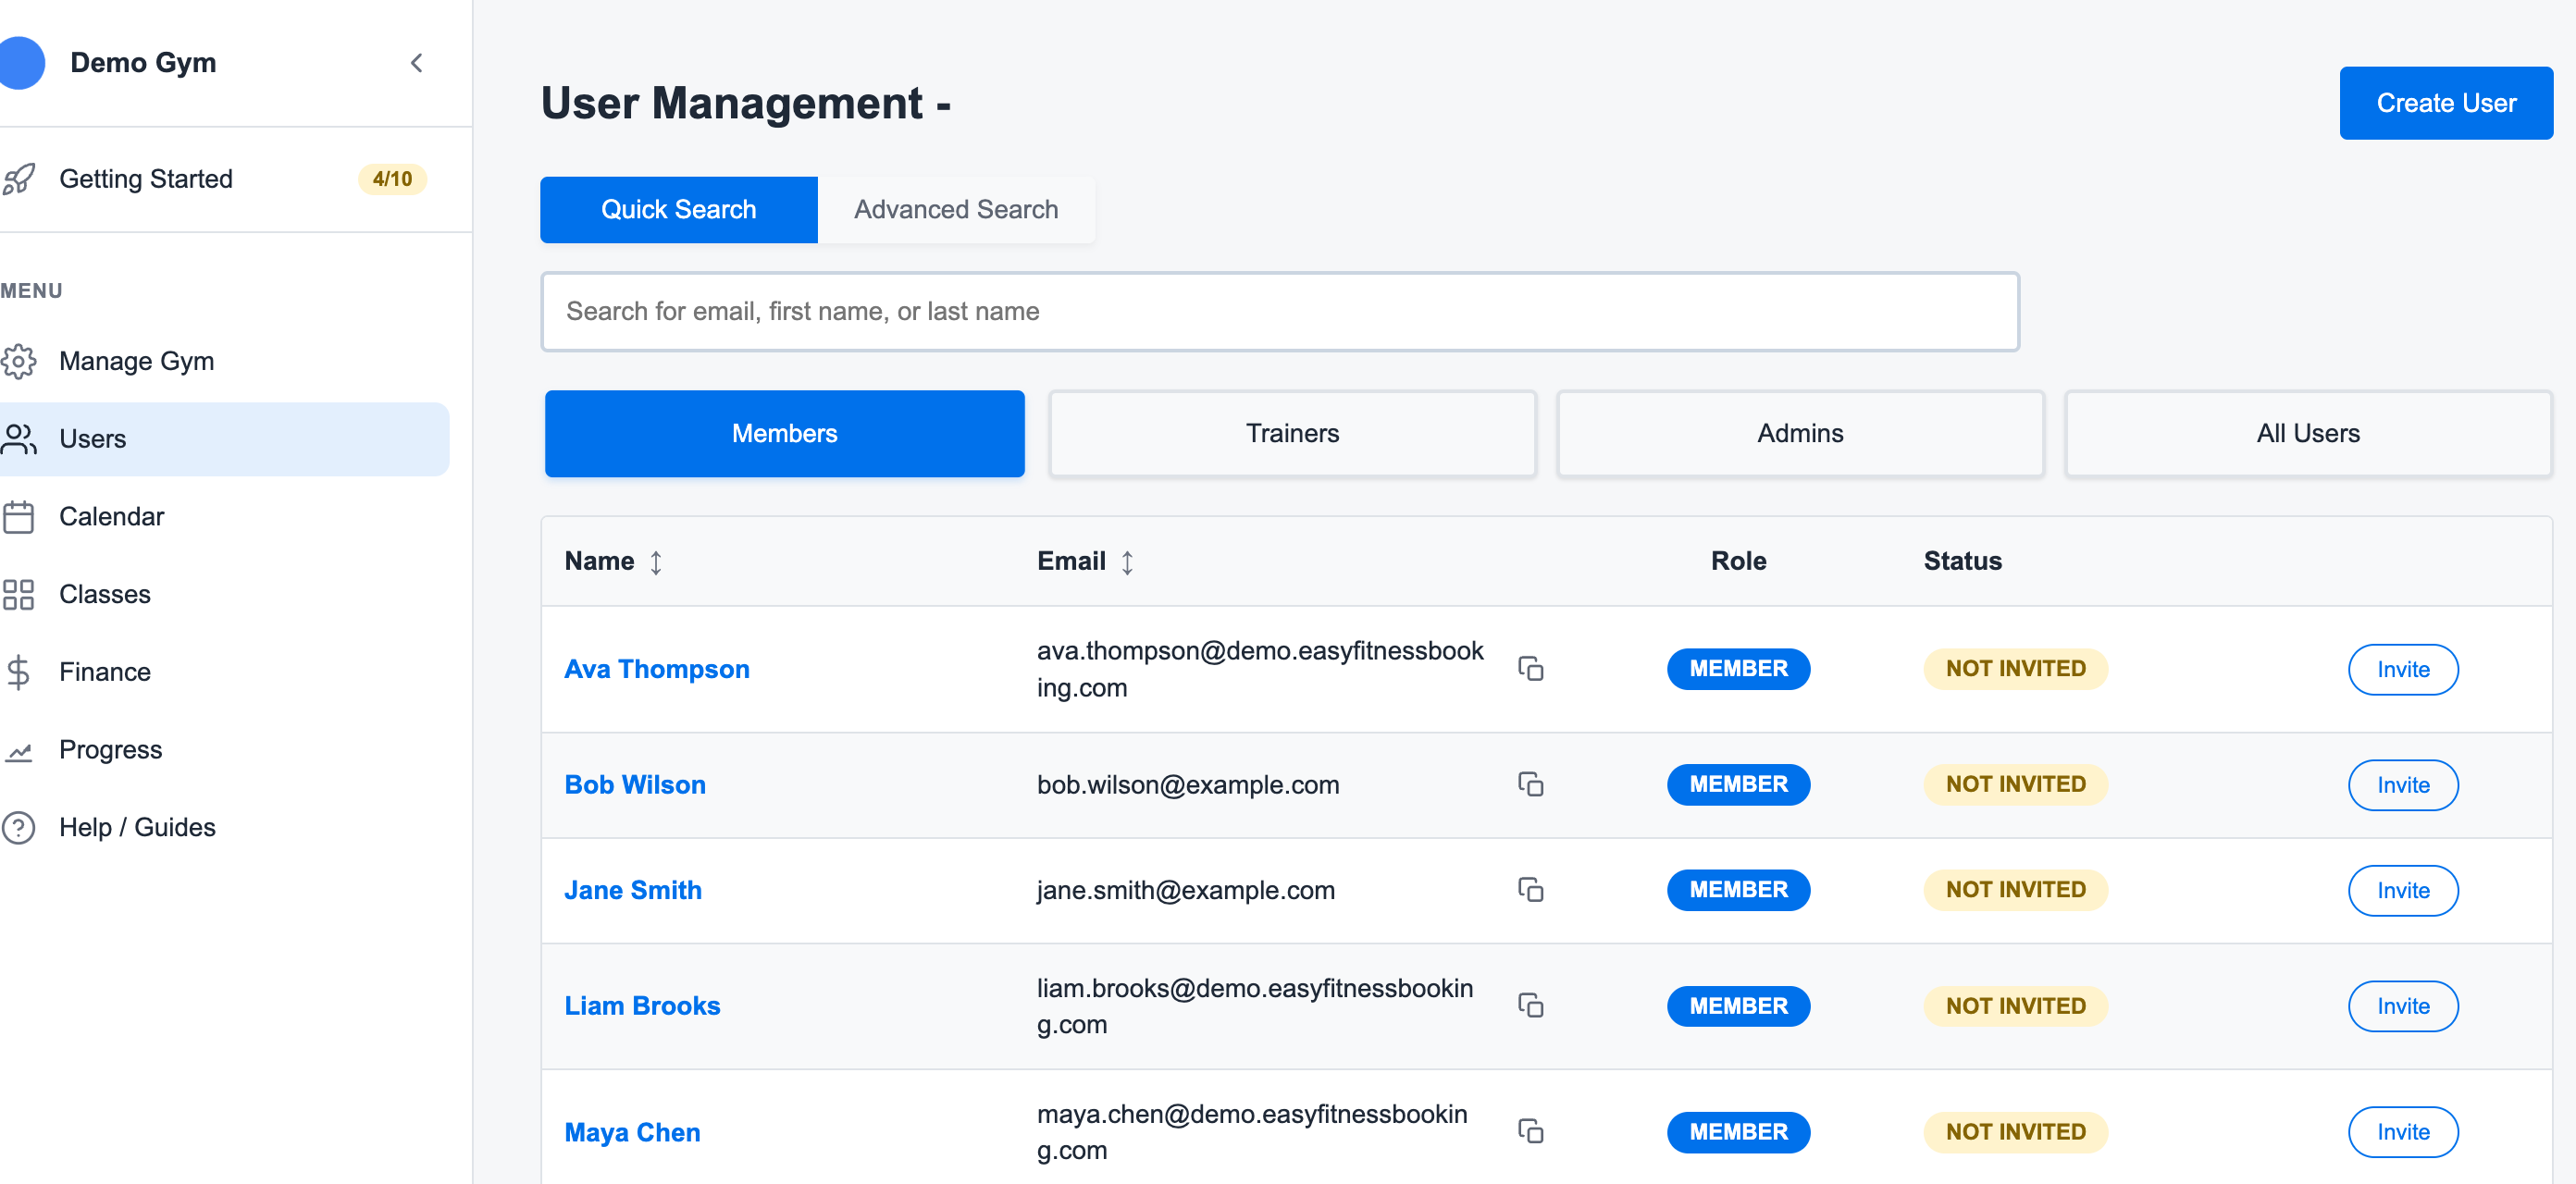
2. Click Create User
Click Create User.
3. Enter Member Details
Use real-looking member information so the account is easy to recognize in calendars, invoices, and screenshots.
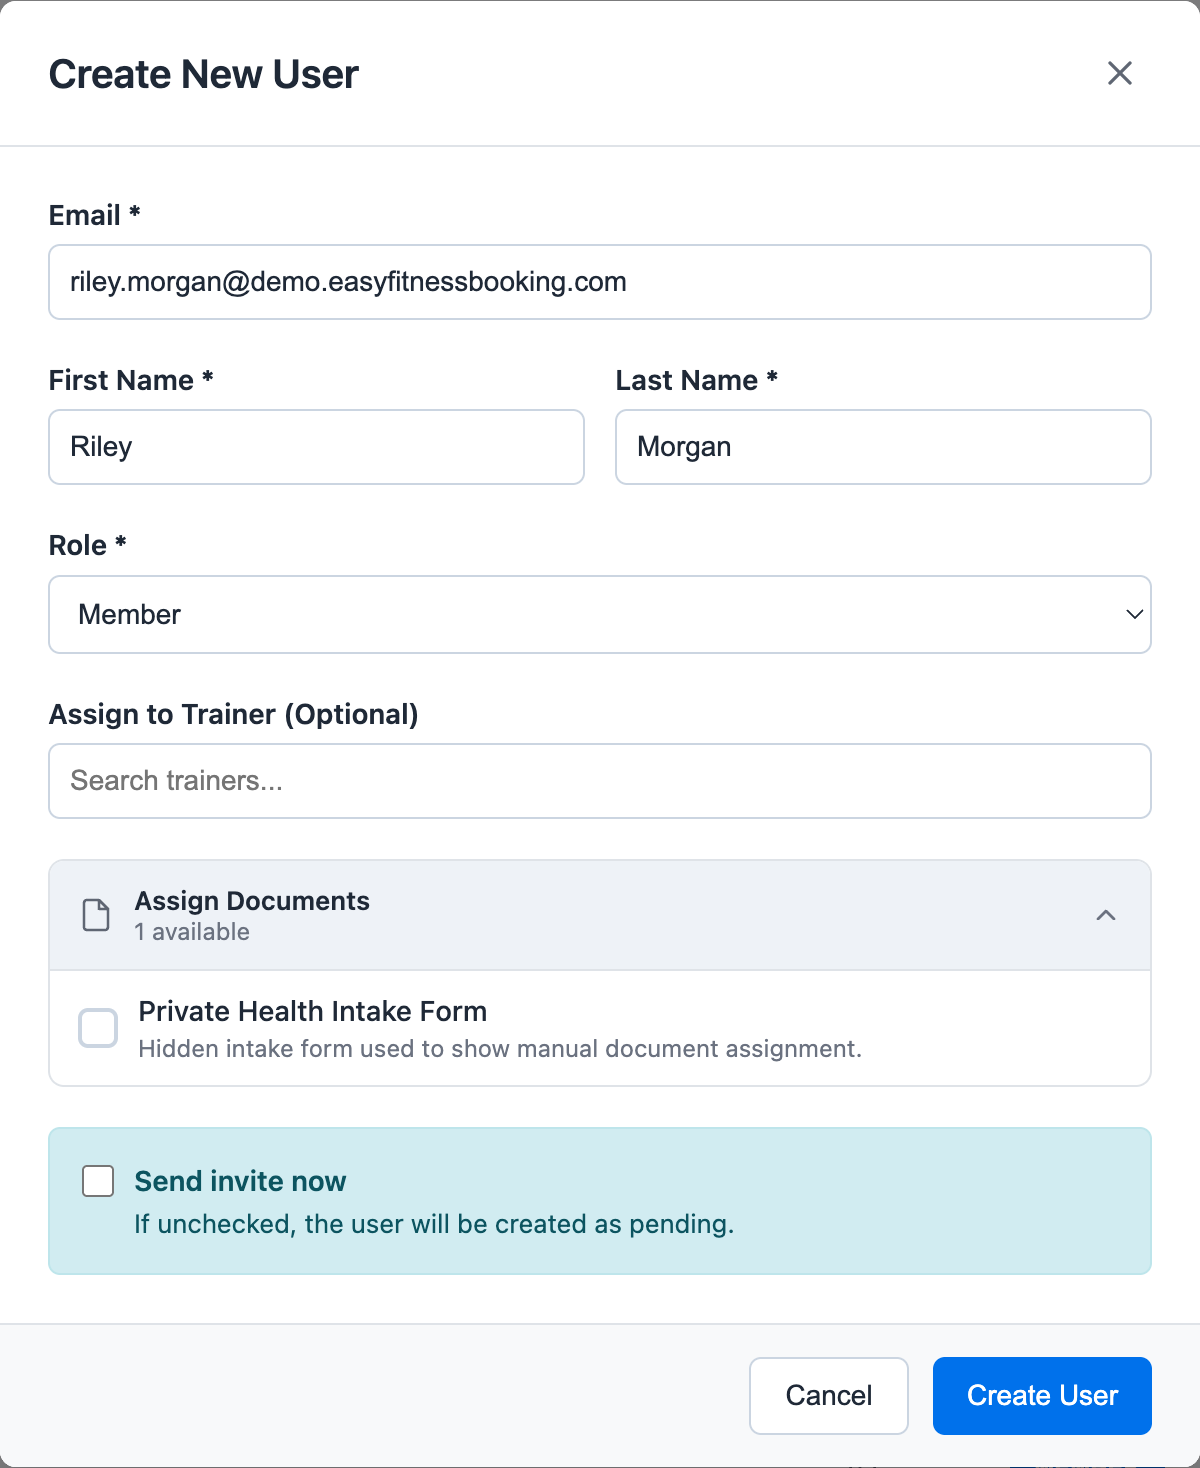
Add:
- First and last name
- Email address
- Role set to member
- Optional trainer client-list assignment
- Optional hidden documents that should be assigned immediately
The trainer field adds the member to that trainer's Client List. It is a convenience filter for trainer-specific calendars, not a hard booking restriction.
4. Decide Whether to Send the Invite
For a test account, keep the member pending and do not send the invite yet.
For a real member, send the invite when you are ready for them to activate their account.
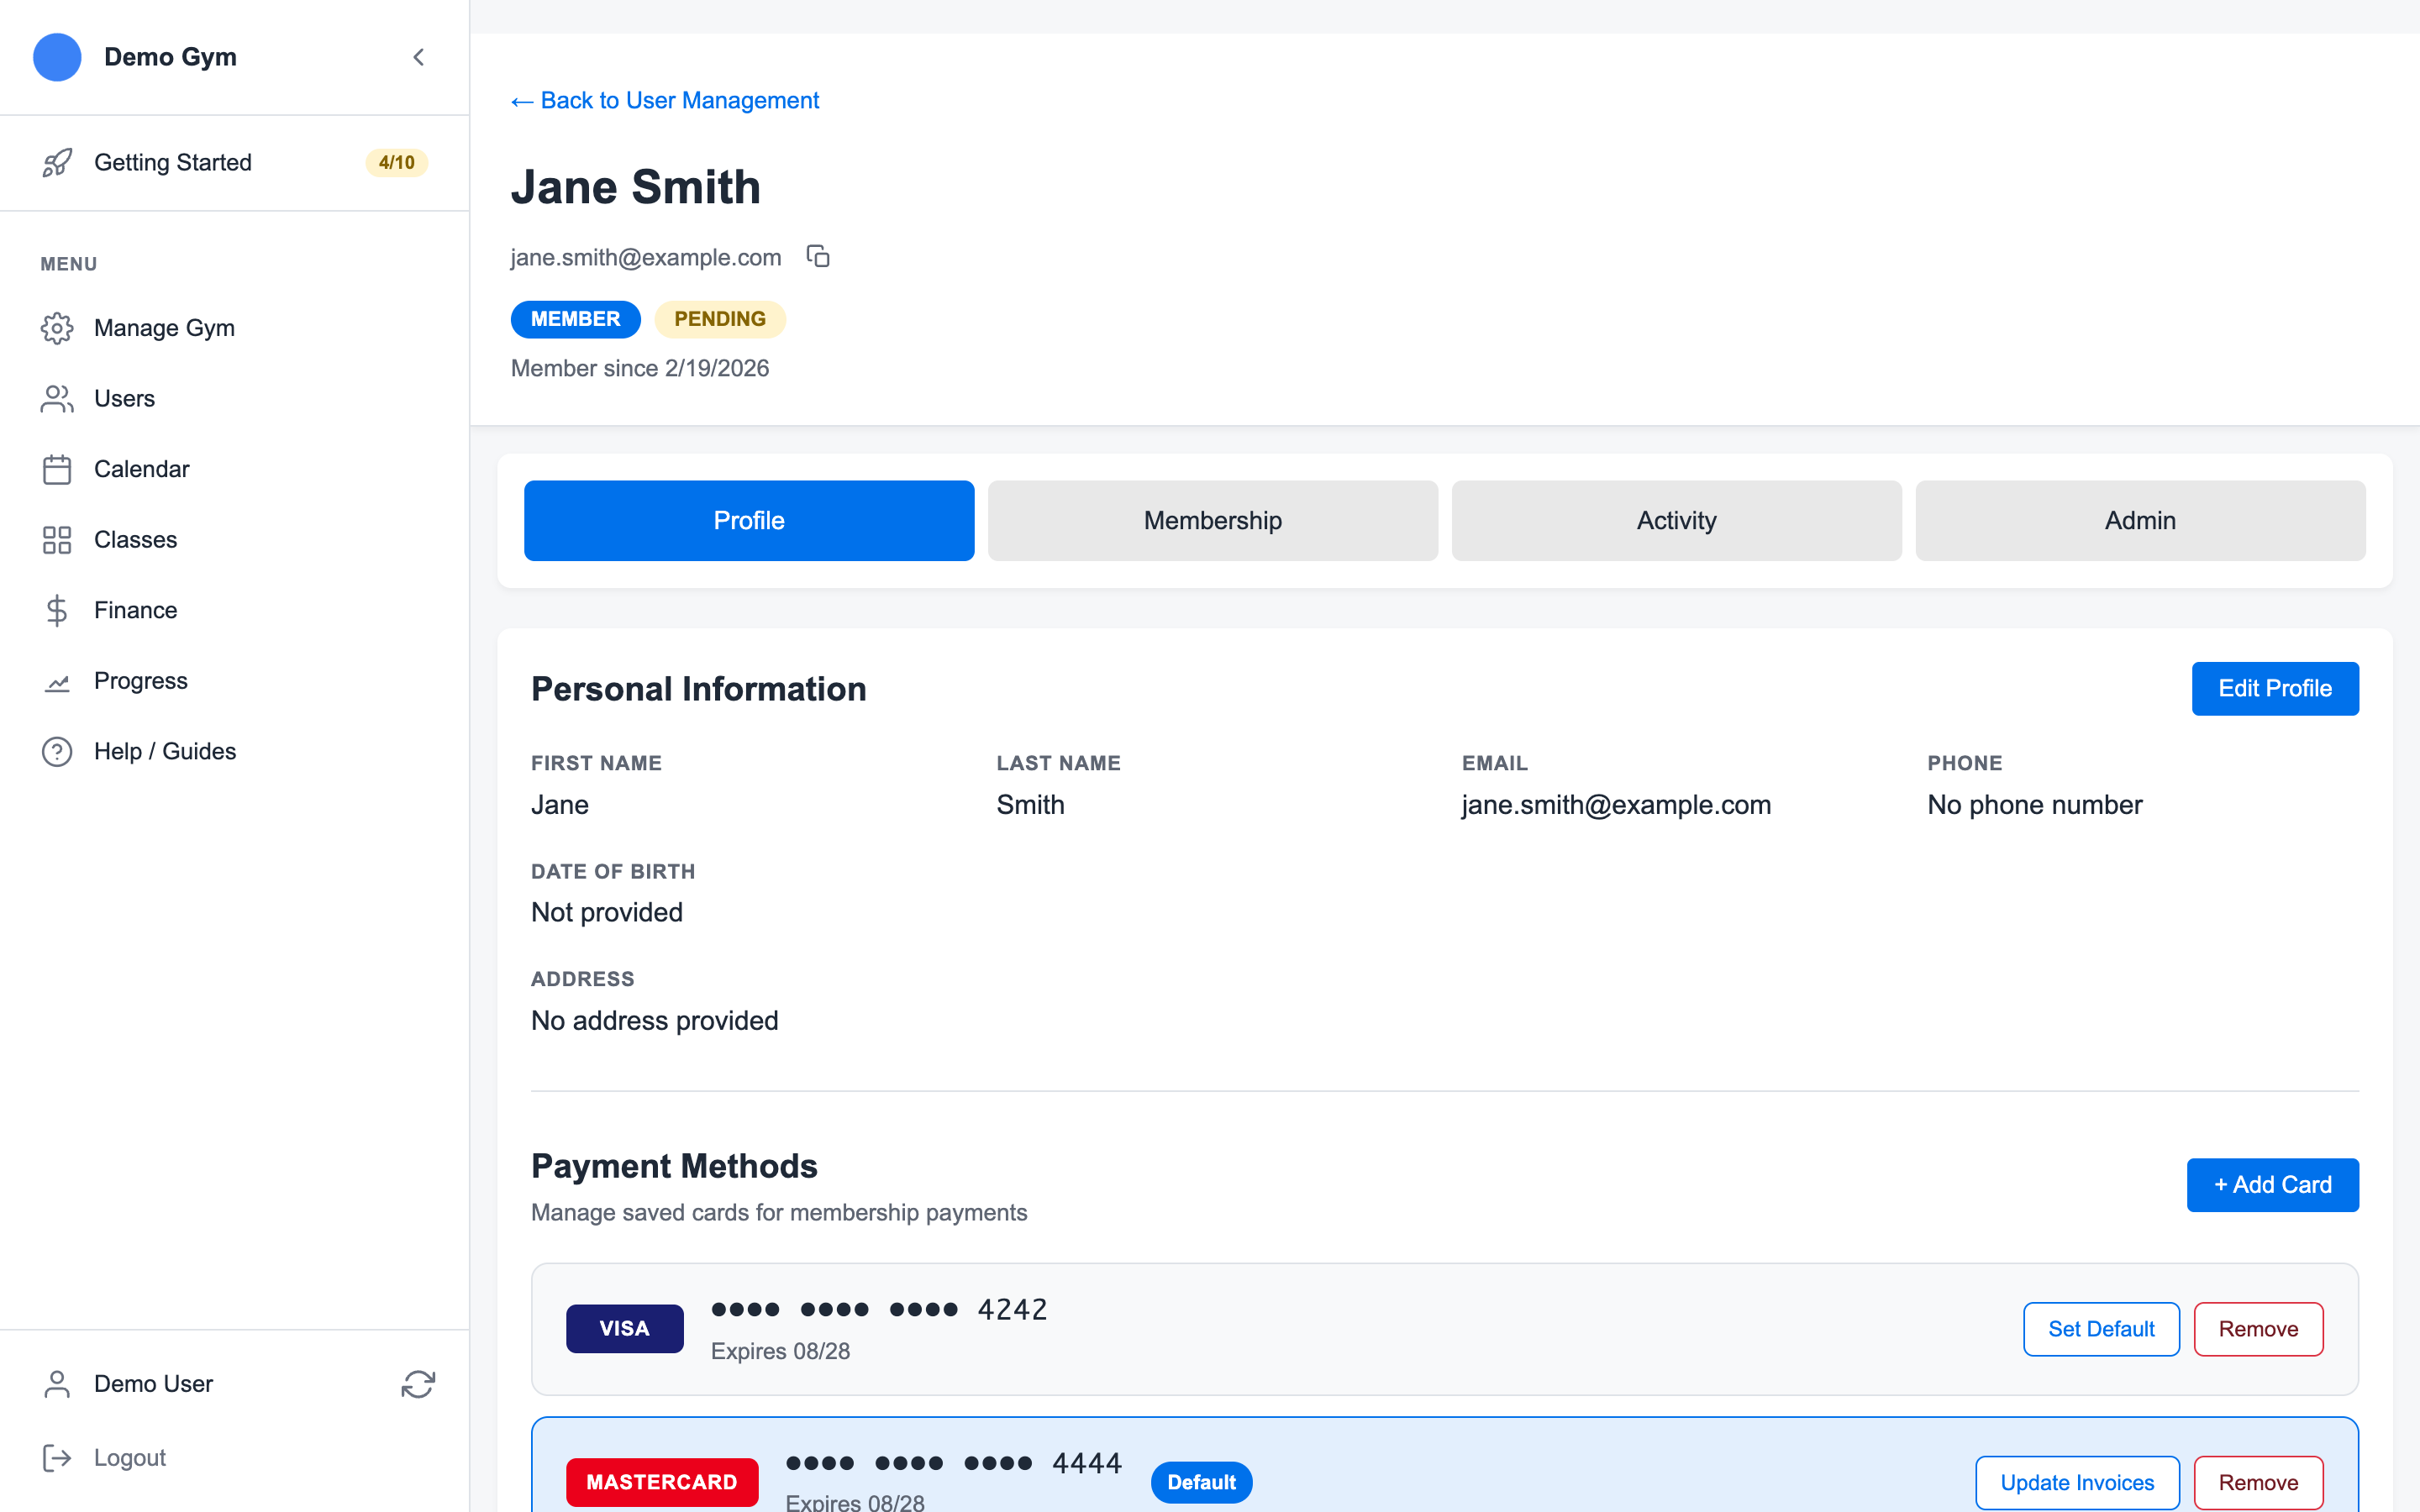
5. Open the Member Profile
After creating the member, open their profile to add payment methods, memberships, documents, and bookings.
Related guides:
Ready to streamline your gym?
Start managing bookings, personal training, and memberships in minutes.
Start Your Free Trial →No credit card required