Set Up Group Classes
Set up class types first, then build the weekly template. The template is the source of truth for recurring class sessions, while the calendar is where staff manage a specific class, roster, waitlist, and attendance.
1. Create Class Types
Go to Classes -> Class Types.
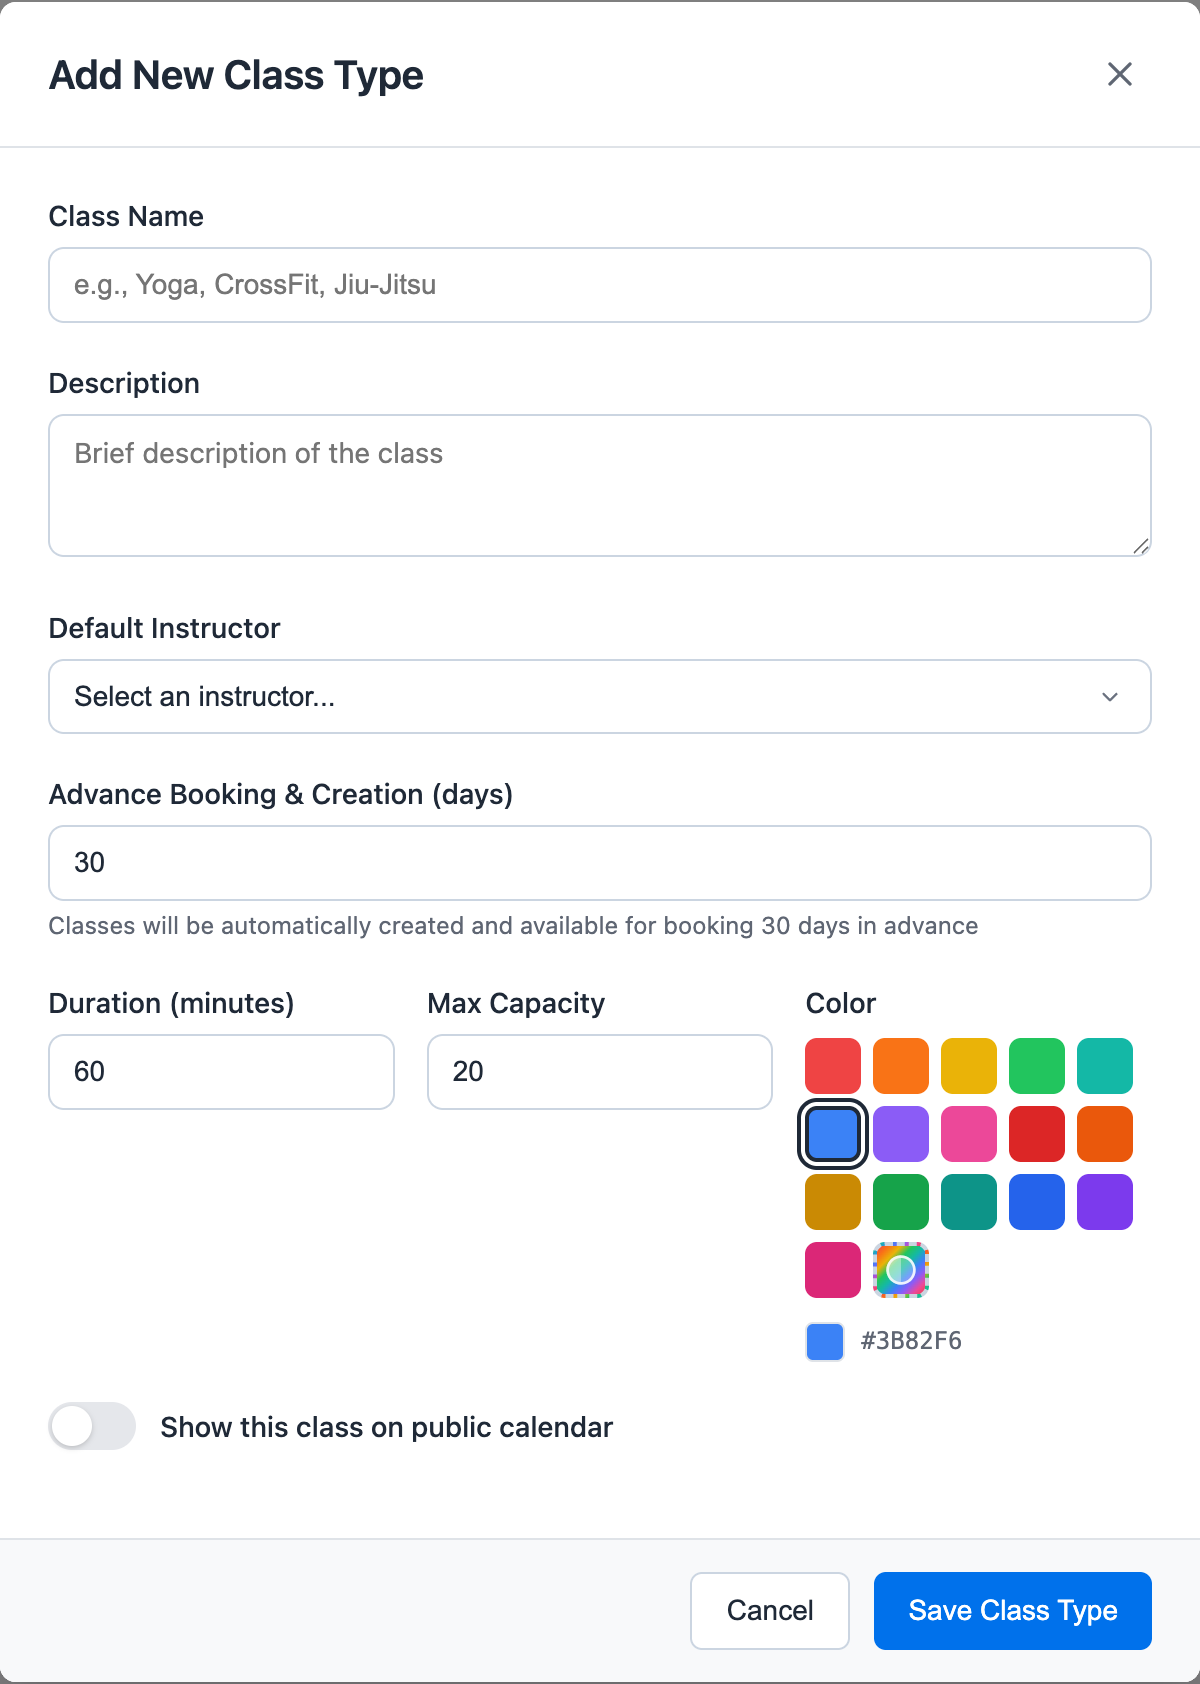
Click + Add Class Type and define:
- Class name
- Description
- Default duration
- Default capacity
- Color
- Default instructor, if needed
- Advance Booking & Creation (days)
- Whether the class type should appear on the public calendar
Advance Booking & Creation controls how far ahead the system should create real scheduled class sessions from the weekly template. For example, if Strength Circuit is set to 21 days, the platform keeps Strength Circuit sessions created and bookable 21 days ahead based on the weekly template.
2. Build the Weekly Template
Go to Classes -> Schedule.
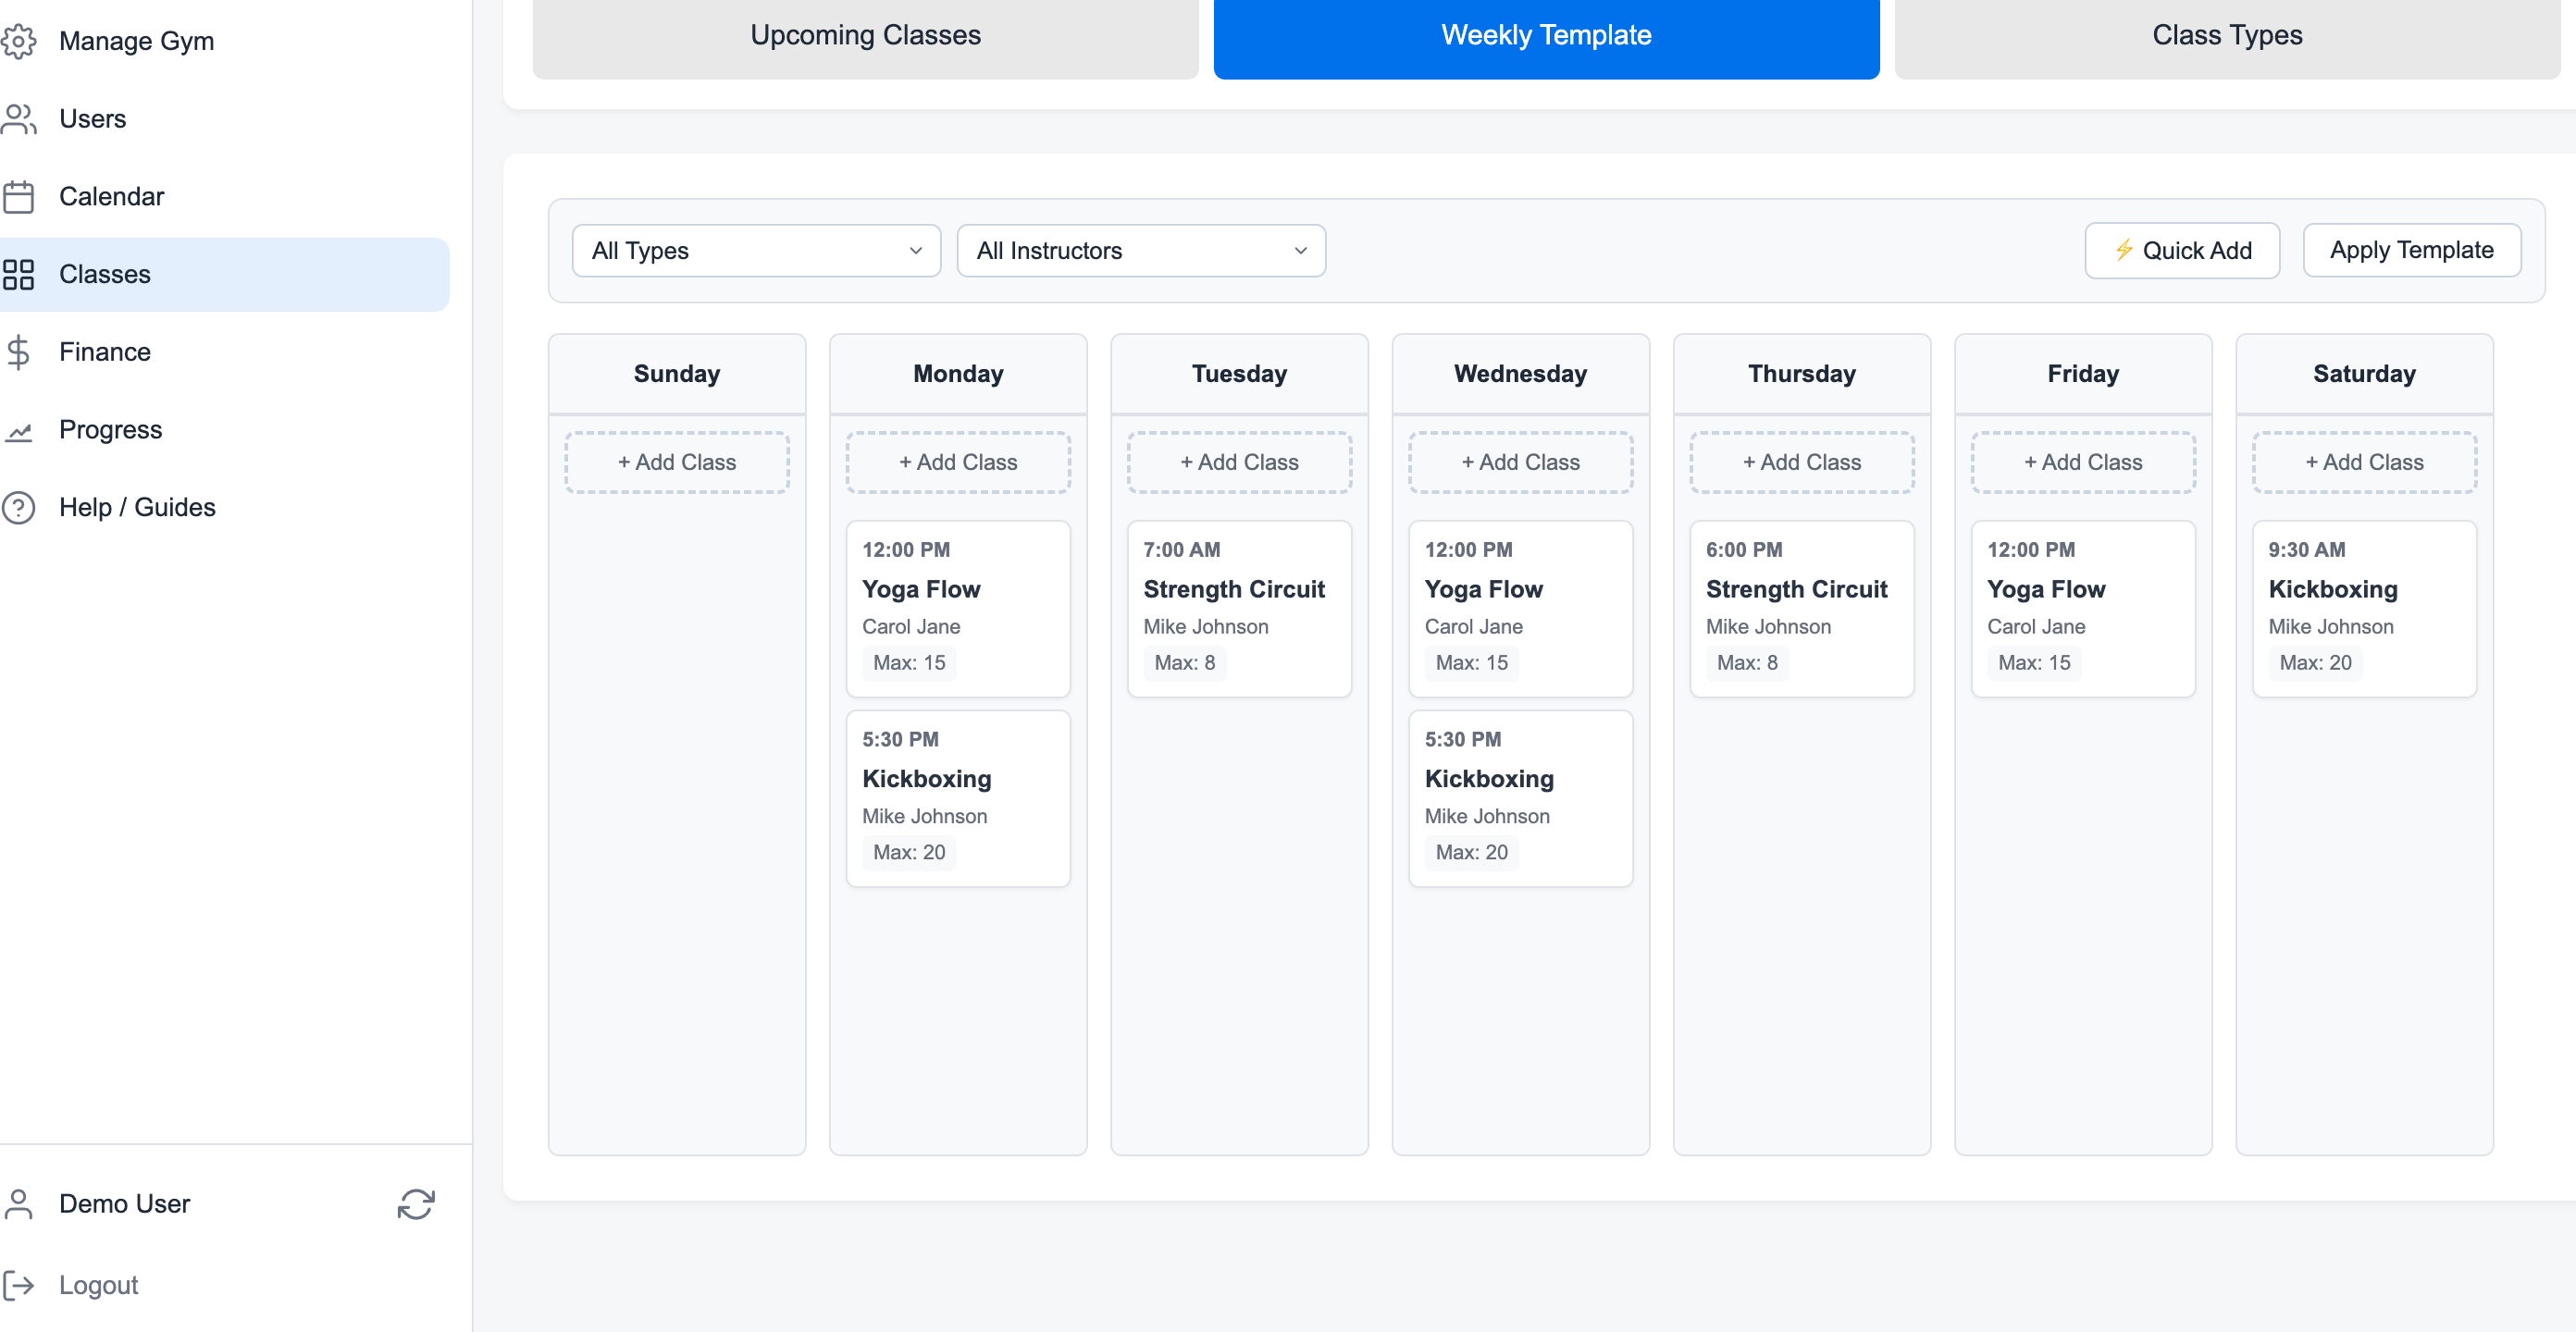
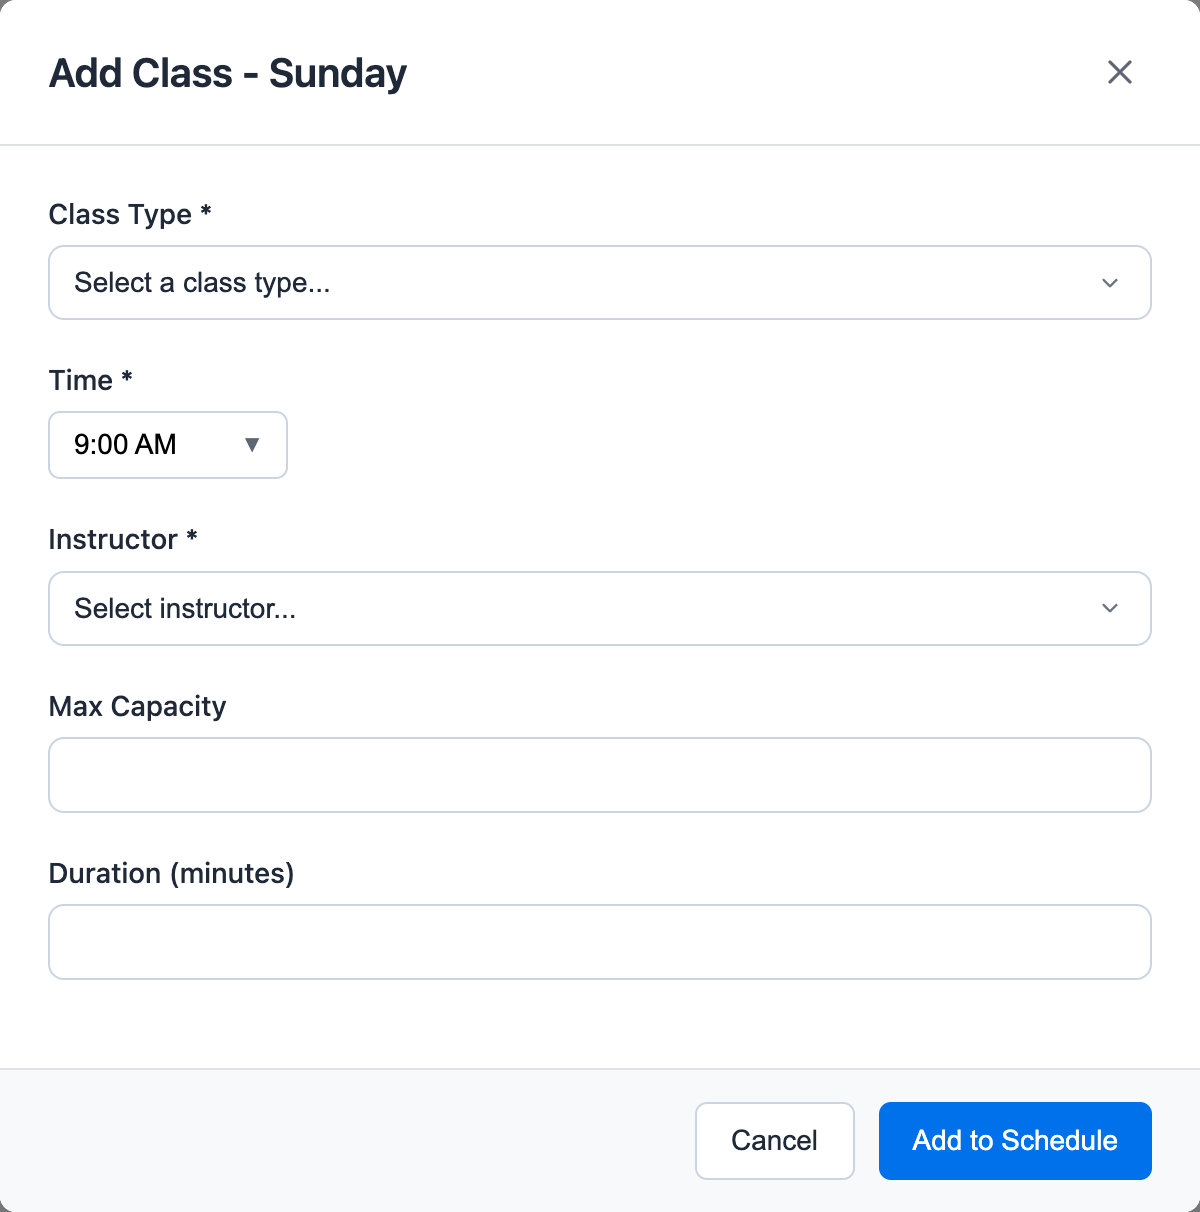
Use Quick Add for patterns like weekdays or Monday/Wednesday/Friday. Use the day columns when you want to place one class at a specific day and time.
Each weekly template entry stores the class type, time, instructor, capacity, duration, and location. This keeps your recurring schedule predictable without forcing staff to recreate the same classes every week.
3. Create Scheduled Classes
Scheduled classes can be created in two ways:
- Automatically, based on each class type's Advance Booking & Creation setting.
- Manually, by using Apply Template for a selected date range.
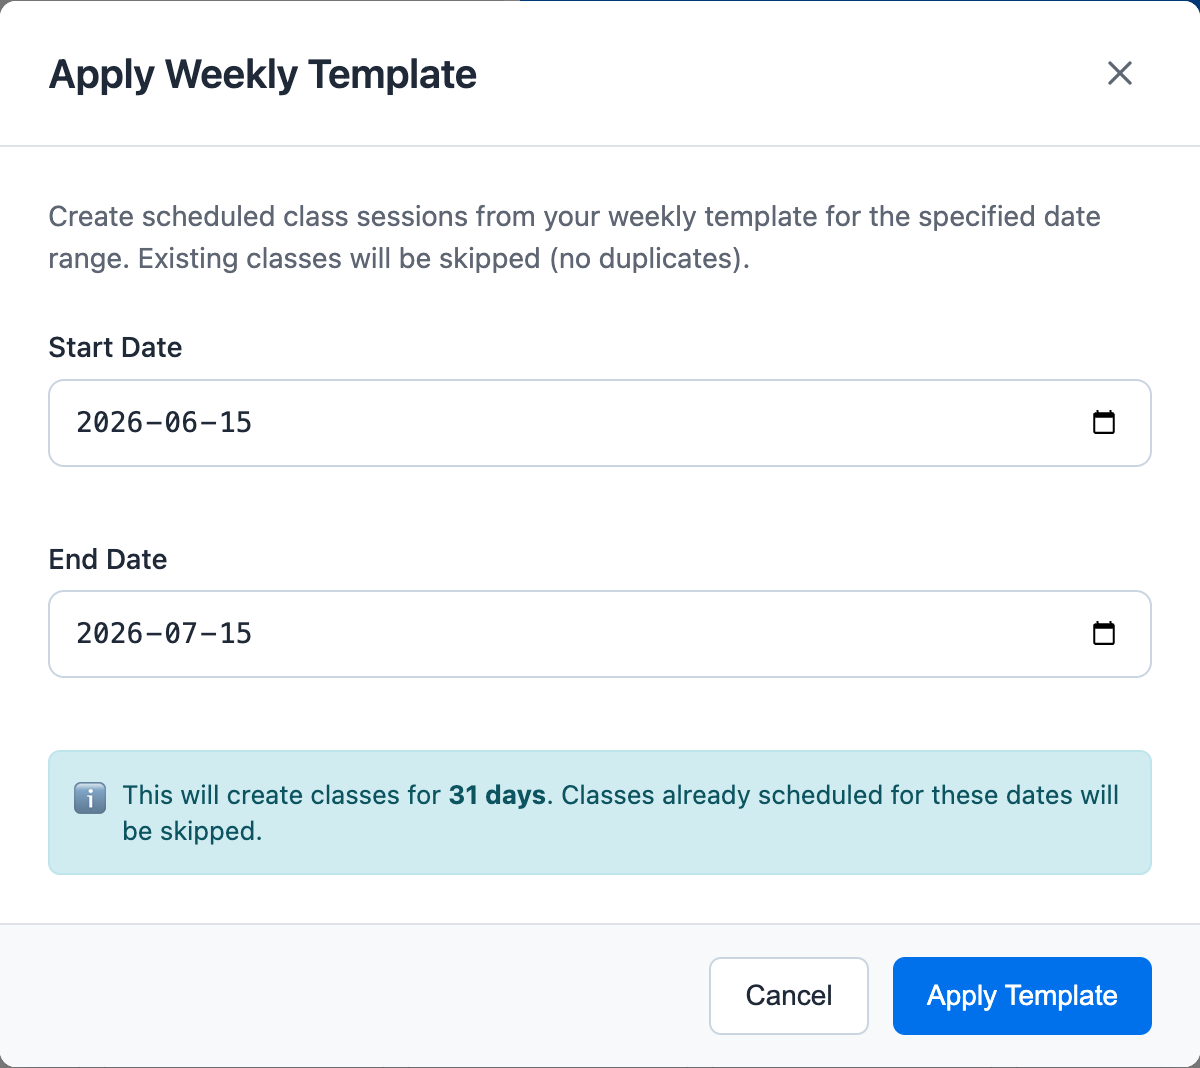
Use Apply Template when you first set up the schedule, after changing the template, or when you want sessions created immediately instead of waiting for automatic creation. Existing classes are skipped, so applying the template does not duplicate sessions that already exist.
4. Manage a Specific Class
Go to Calendar -> Classes, then open a scheduled class.
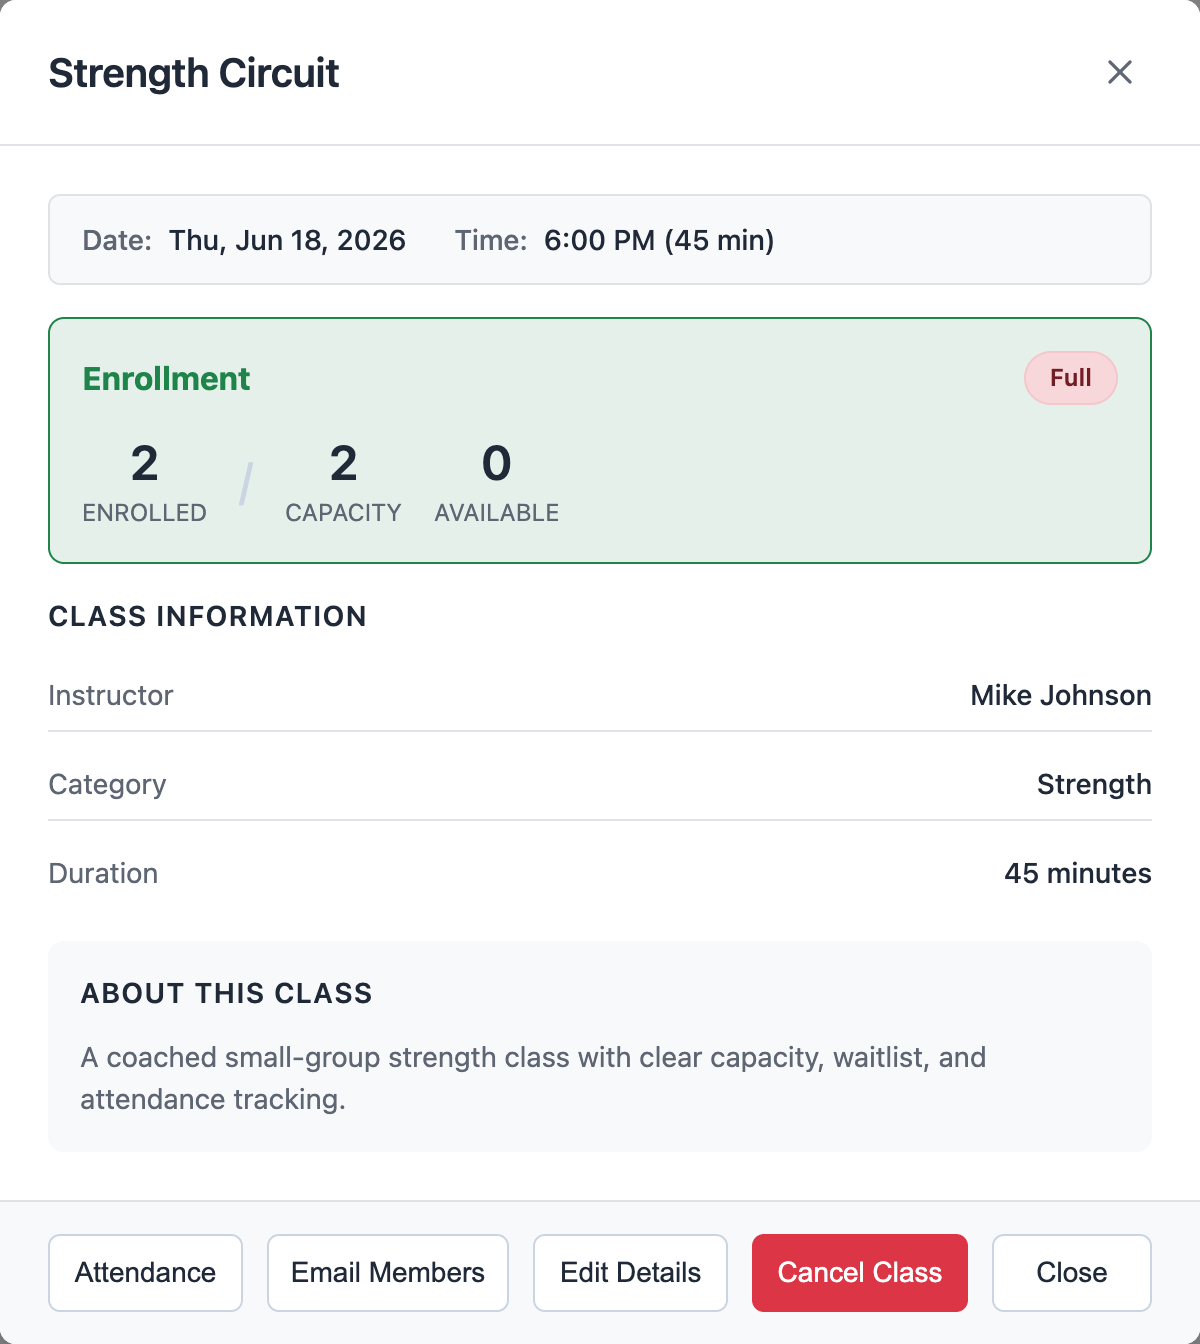
The class modal shows what staff need before class starts:
- Date and time
- Enrollment count and capacity
- Available spots
- Instructor
- Duration
- Class description
- Attendance, email, edit, and cancel controls
5. Book Members and Manage Attendance
Click Attendance from the class modal to manage the roster.
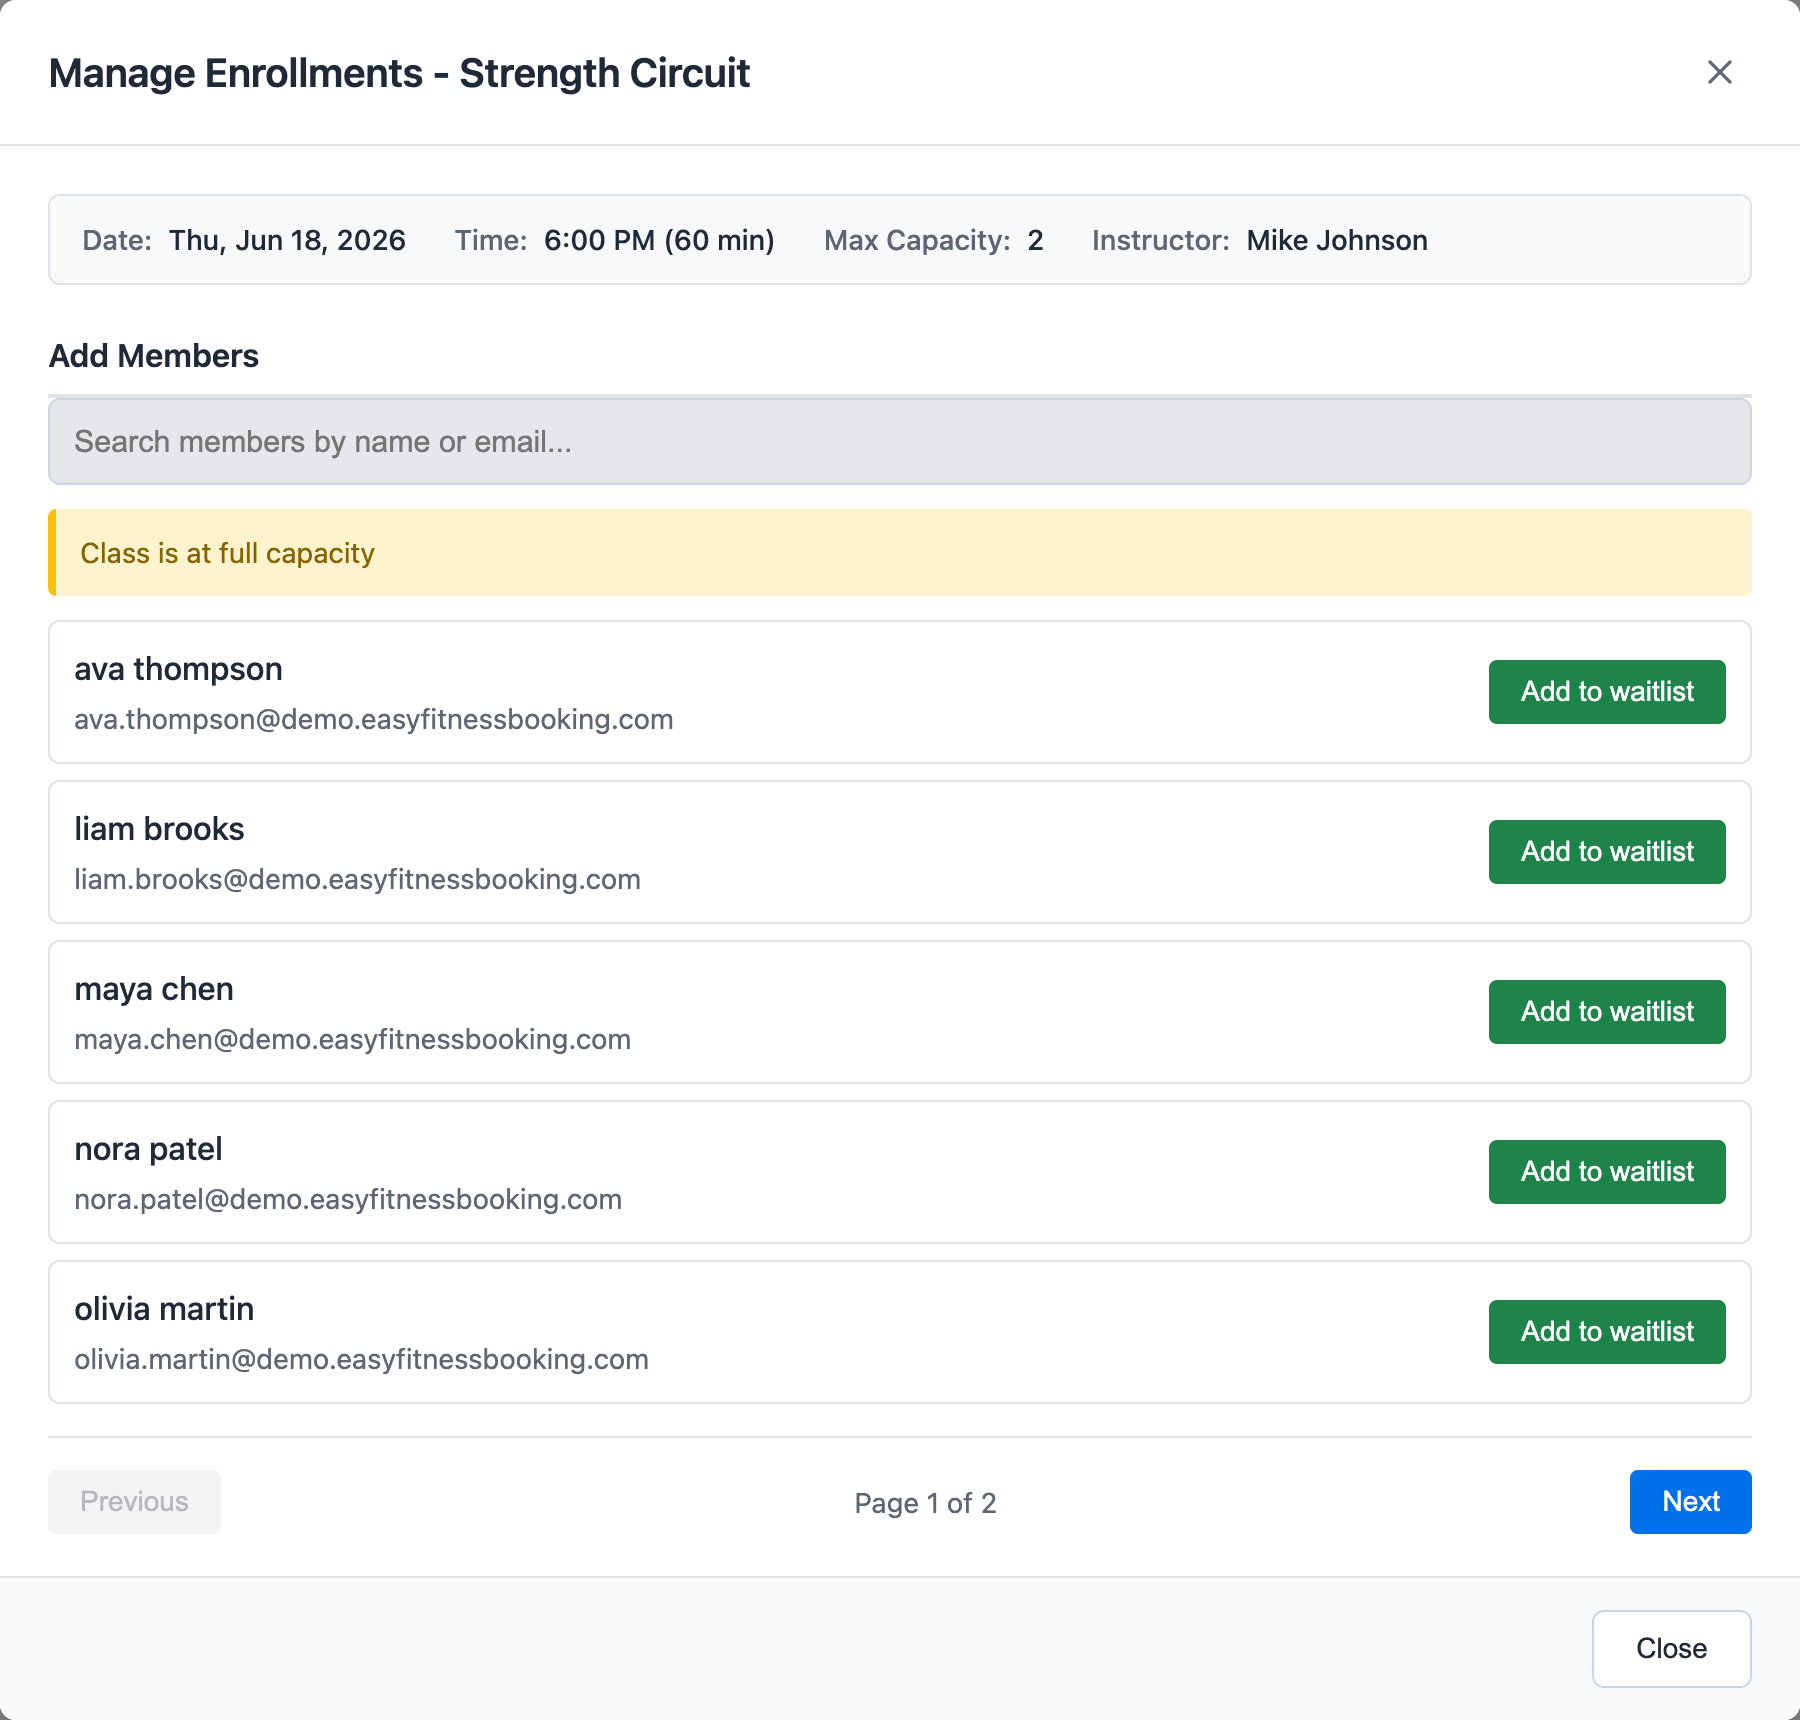
When a member is enrolled, the system uses an eligible class credit and records the booking in that member's history. If the class is full and waitlist is allowed, staff can add another eligible member to the waitlist instead of overfilling the class.
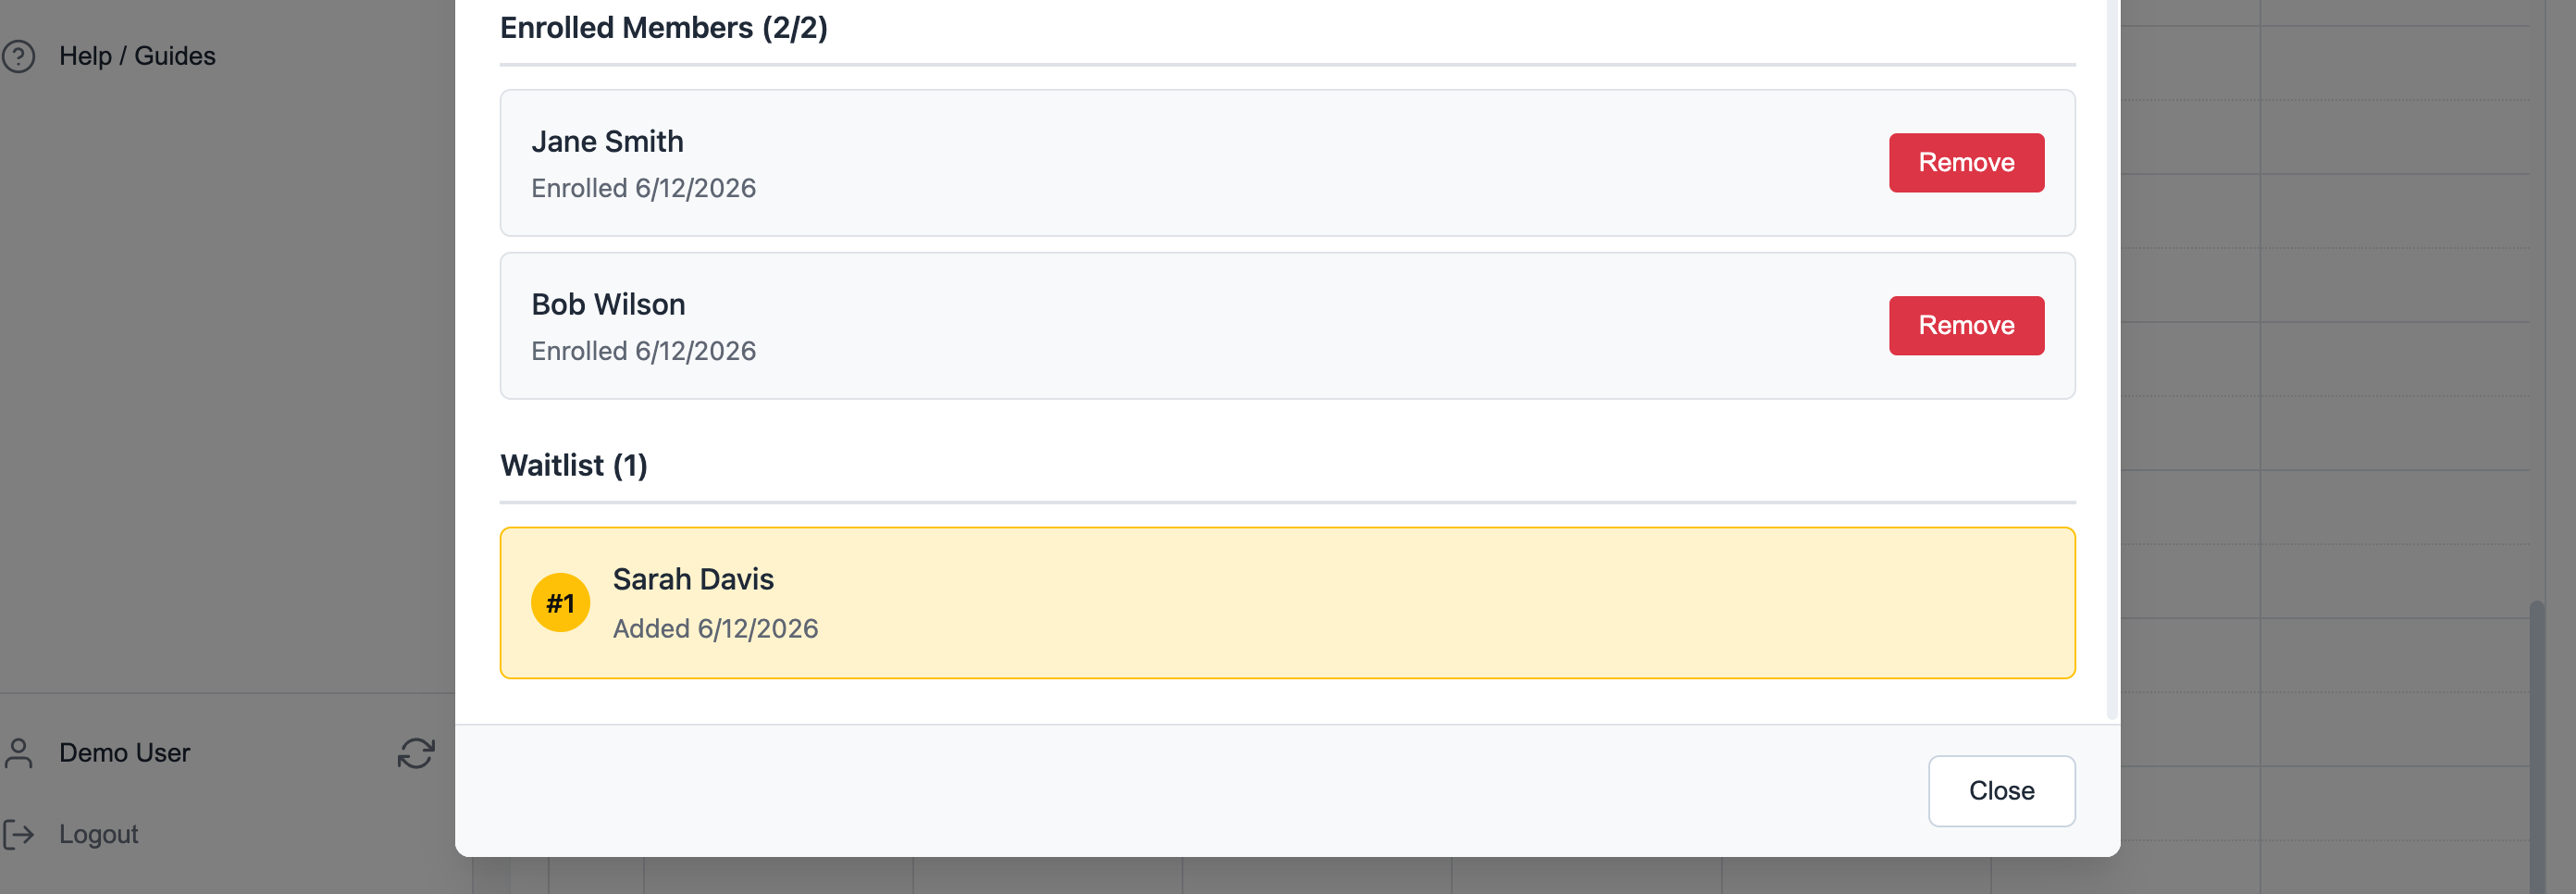
The roster keeps enrolled members and waitlisted members separate. Waitlist order is visible, so staff can explain who is next if a spot opens.
6. Turn On the Public Calendar
Go to Manage Gym -> Settings -> Public Classes Calendar.
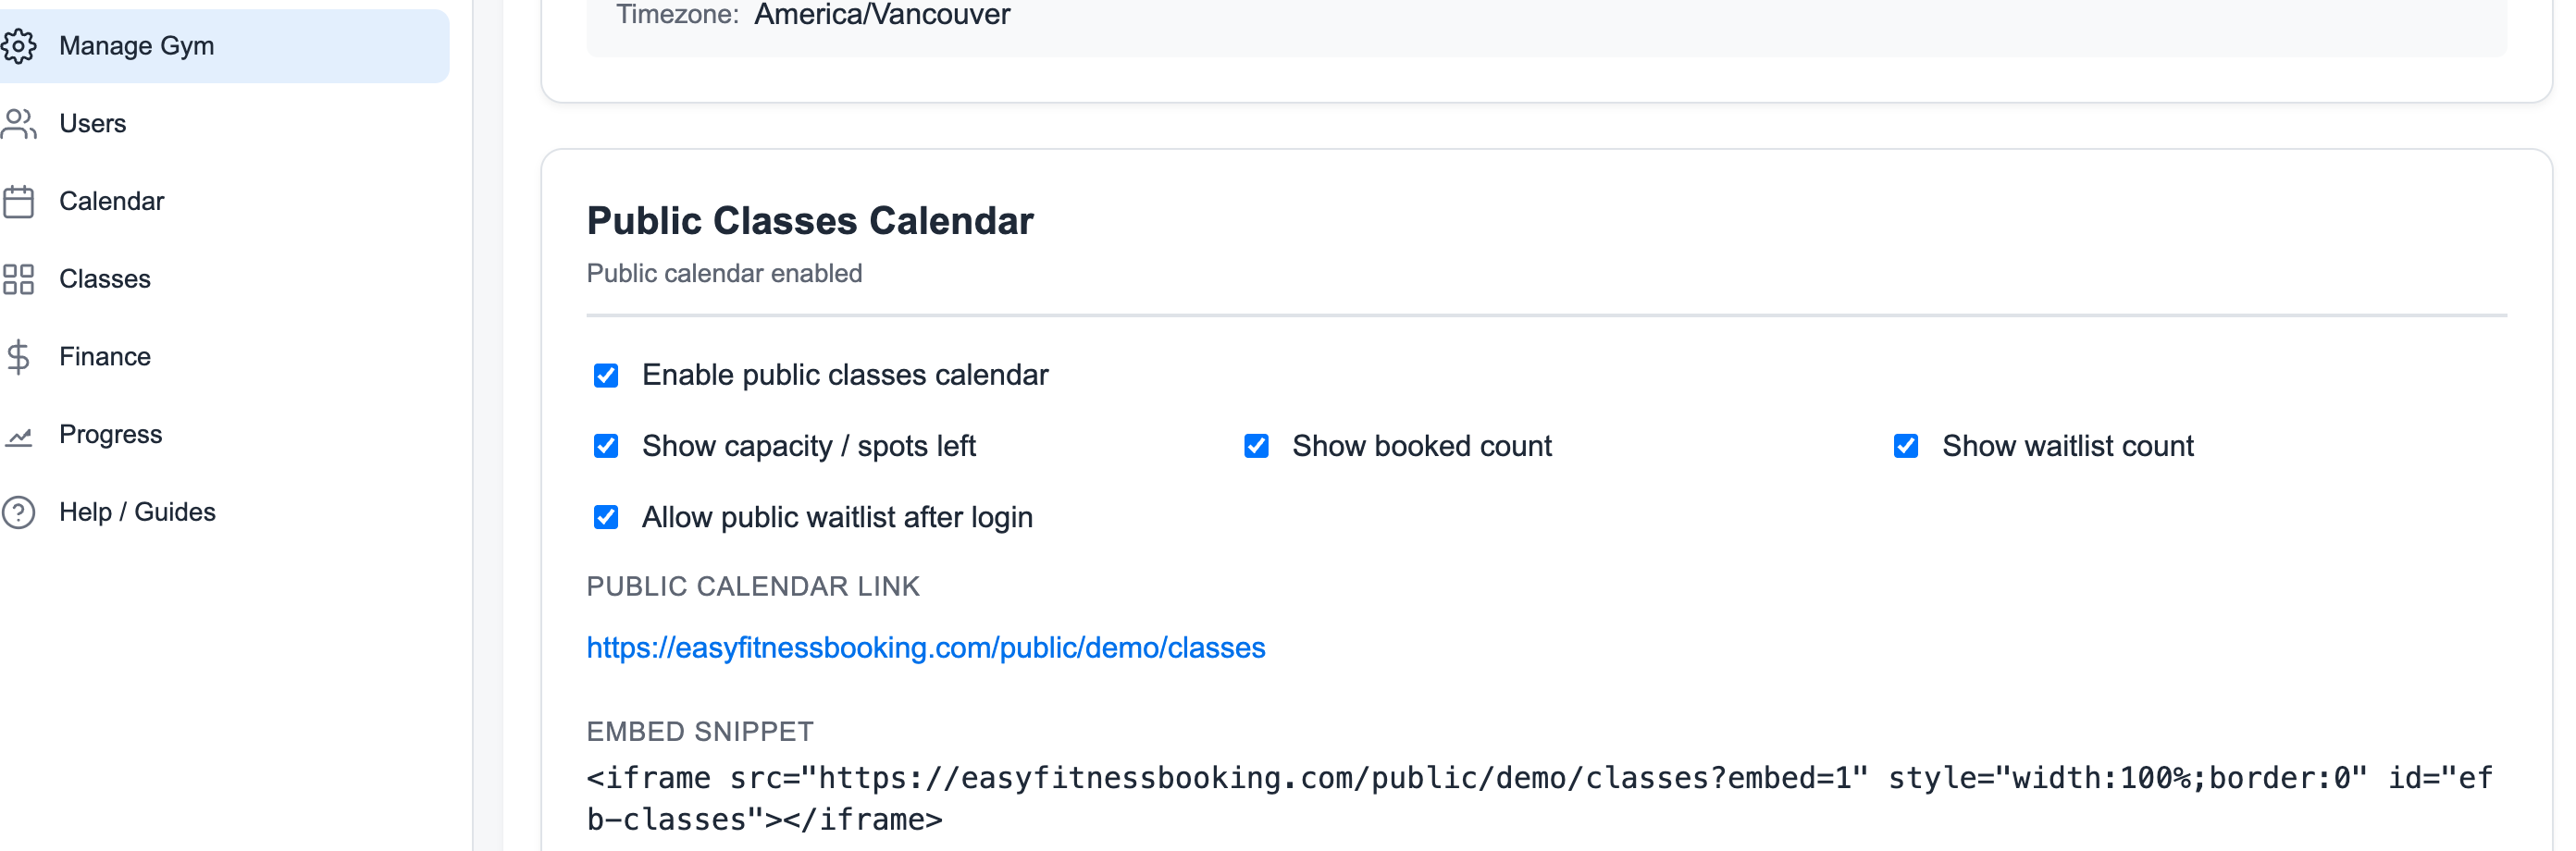
Enable the public calendar, then choose what prospects and members can see:
- Capacity or spots left
- Booked count
- Waitlist count
- Public waitlist after login
Class types must also be marked public before their sessions appear on the public calendar.
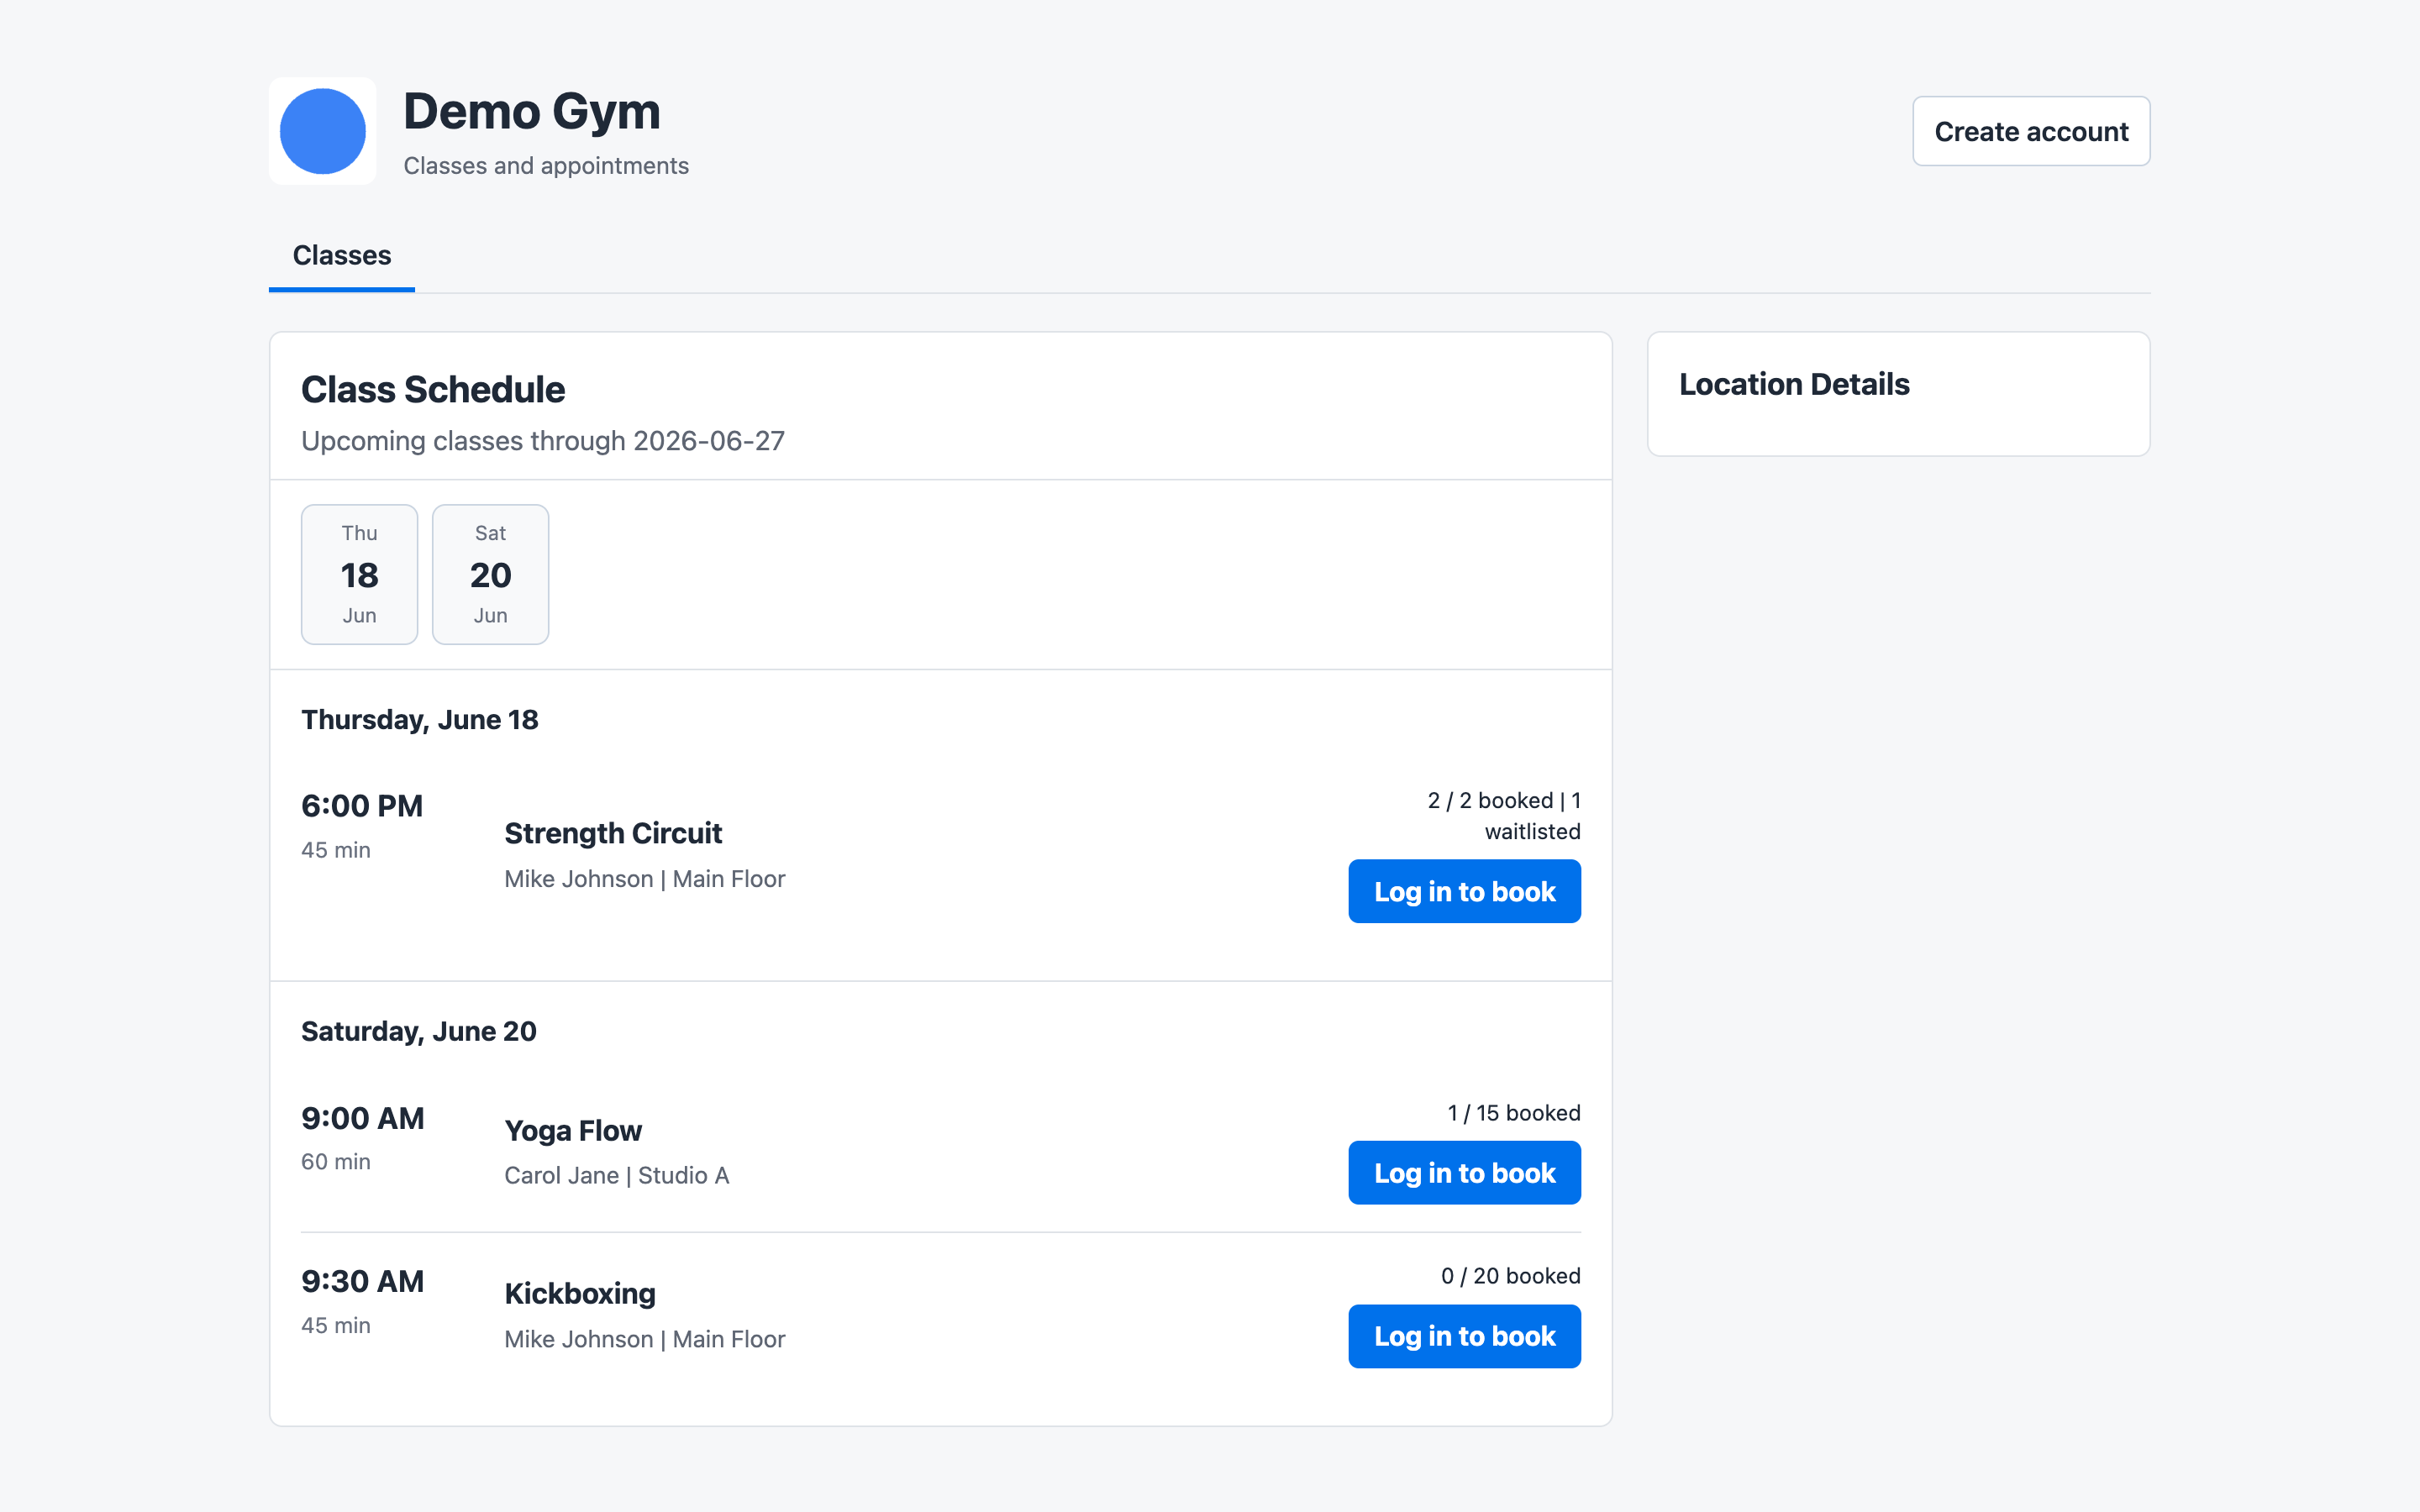
The public calendar gives prospects a clean view of upcoming classes. Members can sign in to book a class or join the waitlist when a full class allows waitlisting.
Related guides:
Ready to streamline your gym?
Start managing bookings, personal training, and memberships in minutes.
Start Your Free Trial →No credit card required